The Multilingual Add-On in Social Pinpoint enables you to deliver your site content in multiple languages, helping you engage more inclusively with diverse community members.
This feature uses fast and reliable machine translation technology to automatically translate your content into the languages most commonly used in your community or by specific audience segments you're targeting.
Key Features
-
Automatic Translation
Content is automatically translated using industry-leading machine translation services (such as Google, Microsoft and Amazon), providing a quick and scalable way to support multilingual engagement.
-
Support for Multiple Languages
You can have up to 15 languages available for your site, ensuring the most relevant options are available to your audience.
-
Phrase Management
If any translated phrases need to be reviewed or updated, you can submit a request to our Support team. We'll review and make adjustments directly within the system on your behalf.
-
Translation Usage Insights
View the top translated languages in your site’s Overview Report, helping you better understand your audience and plan for more inclusive communication.
Setting up
Upon purchasing the add-on, we'll be setting it up on your Social Pinpoint site. During this process - we'll ask you to decide which languages you want installed, you must pick the languages that are available from the list on the Languages List tab in this article.
We can enable the translation for your home page and site sub-pages. The translation functionality will need to be manually enabled by a site admin from the Project's Settings.
To enable a Project's translation:
- Visit the project
- Click on 'Settings'
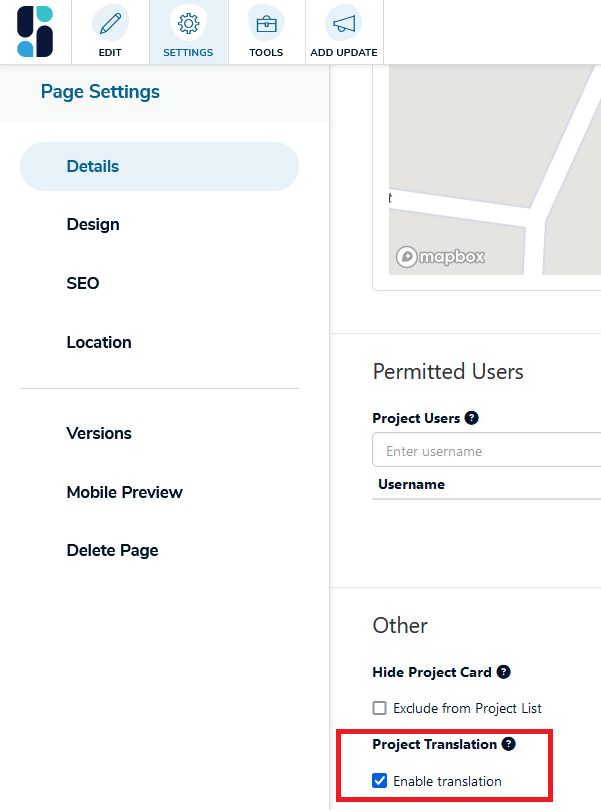
- Scroll down to 'Project Translation' then tick the box for 'Enable Translation'
💡NOTE: It is not possible to automatically enable translation for all your projects.
We want this to be a conscious decision as data will be shared with the machine translation services about your projects.
Once successfully enabled, the content of your Social Pinpoint
site will be automatically translated into your nominated languages. You
will see a language picker active on your site that allows users to
switch the language of the page.
If this does not work as expected, please contact log a support ticket for assistance.
⭐Managing Translations and Phrases
Translations for your site’s selected languages are automatically generated using machine translation. You can review and edit these translations directly from your Dashboard to ensure accuracy and localisation consistency.
If you have the Custom Translation add-on, you’ll also have access to the Phrase Management system, which allows you to view, edit, and manage individual translated phrases in more detail.
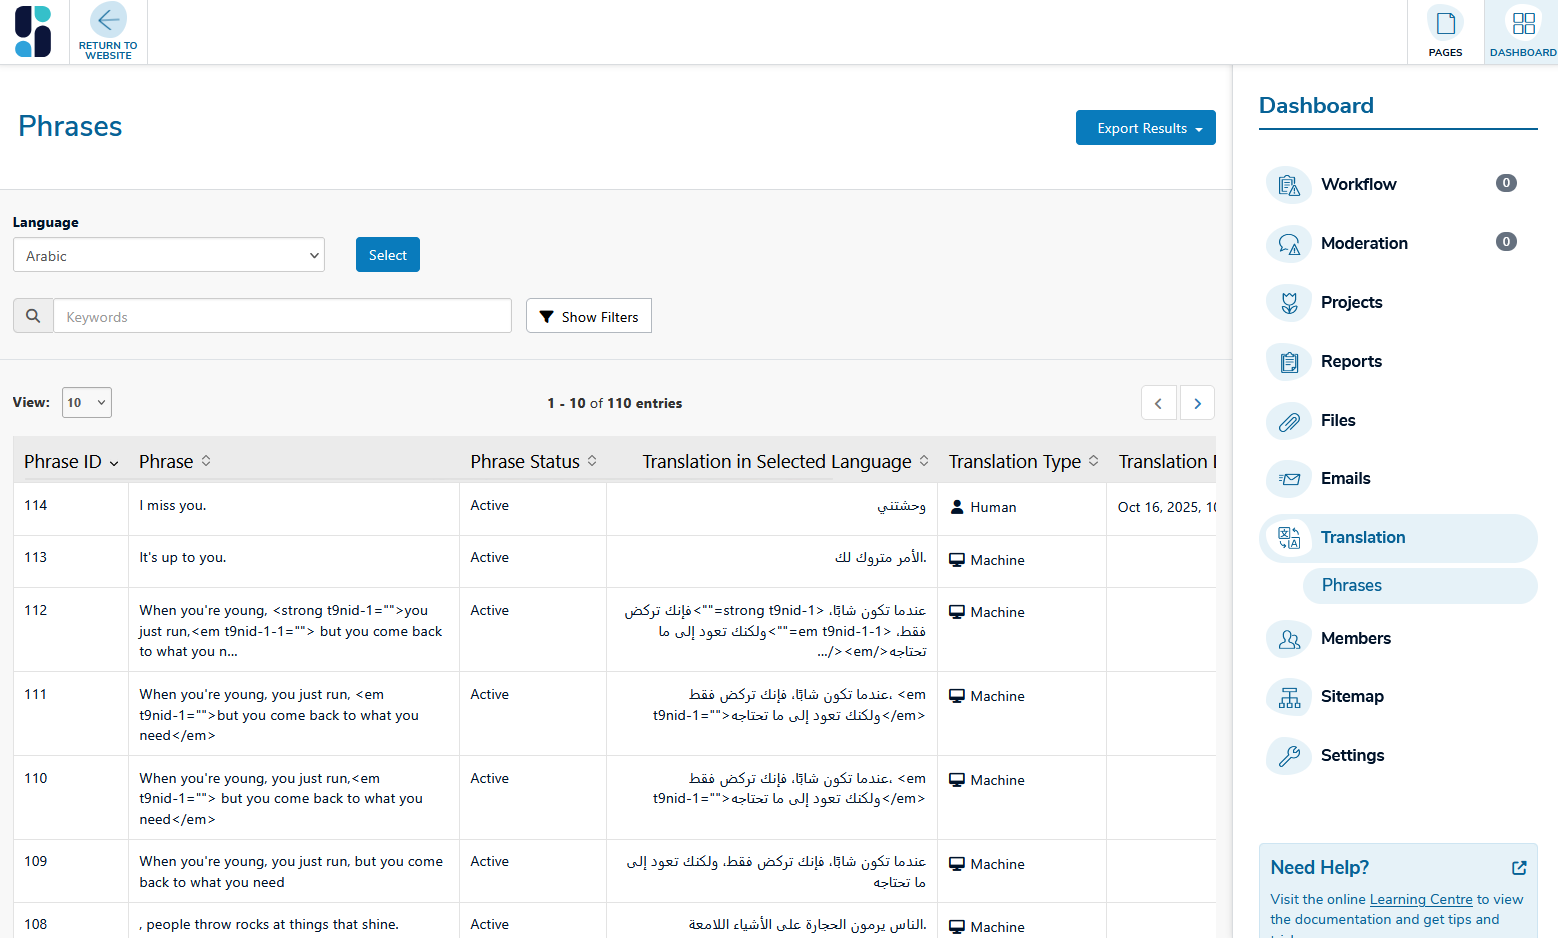
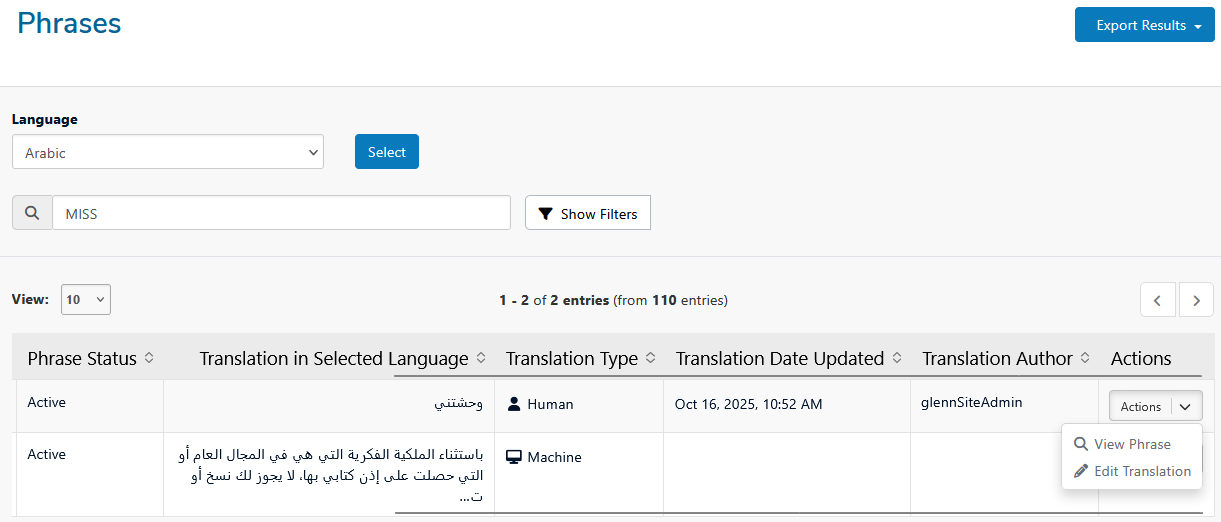
Accessing the Phrase Management Area
Go to Dashboard → Translation → Phrases to view and manage all site translations.
⚠️ Accessibility Note:
The current Phrase Management interface is not fully accessible for screen readers or keyboard navigation. We recommend using it with assistance if accessibility support is required.
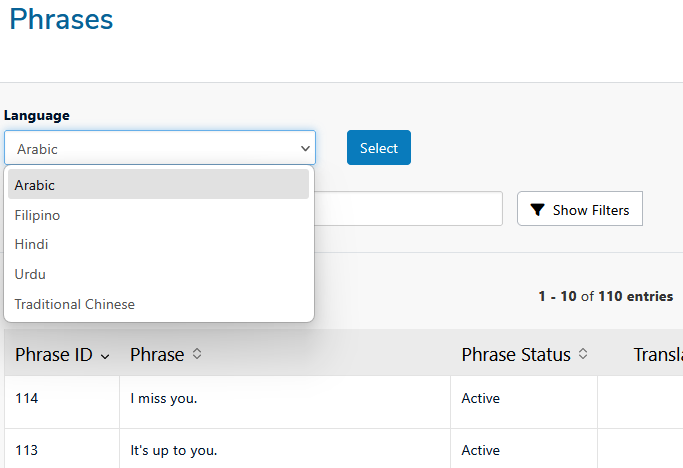
Change Language
At the top of the page, use the language dropdown to select one of your active languages.
All phrases shown will relate to the selected language.
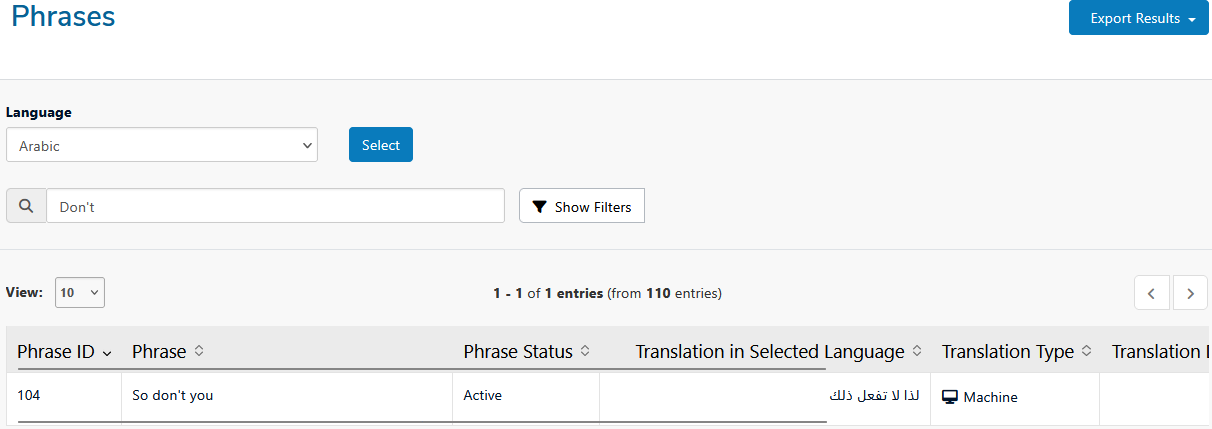
View and Search Phrases
Use the search bar and filters to quickly find specific phrases or translations.
Each phrase is displayed in an easy-to-read, spreadsheet-style table that includes:
| Column | Description |
|---|
| ID | Internal phrase identifier |
| Phrase | The original text in English |
| Translation | Translated version for the selected language |
| Status | Indicates if the translation was created by a machine or a human |
| Updated | Date the translation was last modified |
| Author | Who last edited the translation |
| Actions | View or edit the selected phrase |
💡 NOTE: You can filter phrases by Machine or Human translations for easier management.
Edit a Translation
To modify a phrase:
-
Click the Actions dropdown beside the phrase you’d like to update.
-
Select Edit Translation.
-
A pop-up window (modal) will appear showing:
-
Phrase (read-only)
-
Language (read-only)
-
Translation (editable field)
When editing, you may see placeholders like {{1}}bold{{/1}} instead of HTML tags. These placeholders protect your site from broken formatting during edits.
⚠️ IMPORTANT:
-
Do not alter or remove placeholders - they represent HTML tags and attributes used in your site content.
-
Changes are validated automatically; broken placeholders will prevent saving.
-
Once saved, the phrase’s status updates from Machine → Human.
- Each phrase is treated as a unique content unit. If the same phrase appears in multiple locations, any update you make will automatically apply to all instances across your site.
Other information
Here's some other important information about the add-on:
- You cannot edit translations of The Social Pinpoint interface
itself (e.g. the hard-coded copy of a button element). If you need to
update any of these translations, please contact support.
- To ensure the integrity of the responses, all open-text
contributions by your community (surveys, ideas, social map posts, etc.)
that is in a language different from the system default will not be
translated. We will provide the language the page was being viewed in to assist with understanding the Language usage.
- Public content submitted by your participants can only be moderated
in English. Content in any other language will be referred back to
your for review and approval by our moderators.


