You can control the visibility of who can see and access your projects on your site.
There are two options for restricting access: 'private projects' and 'password-protected' projects. Each of these options provides a different level of security and method to access them.
These options are useful when you want to engage with external stakeholders, citizen panels, focus groups, internal staff, or other closed groups.
Private projects
Private projects restrict access by only letting specific user accounts to access them. Only named users can see the contents of your project and leave feedback.
Private projects are useful for small to mid-size groups, and give you a relatively high degree of security in keeping your information confidential as they are invite-only.
Users must have a user account on your site before you can add them to a private project. They can add themselves via the registration form on your site, or you can add them manually in the Members area of the Dashboard.
If you have a list of people that you need add to the site, you can bulk upload them using a CSV file, or adding all members from an existing Group.
When you publish a private project, a new project notification will not be created. You will need to notify the invited users separately.
Project Sub-pages
Project Sub-pages cannot be made Private on their own. They will inherit the permissions from their parent Project Pages, which means that all users with access to a Project Page will have access to all of that project's Sub-pages.
File sets
It is important to note that permissions will also be inherited by the File Set associated to a Private Project.
This means that files added to a Private Project's file set will only be accessible to people who have access to that project. This includes images, document libraries and any other files that are uploaded to your File Manager.
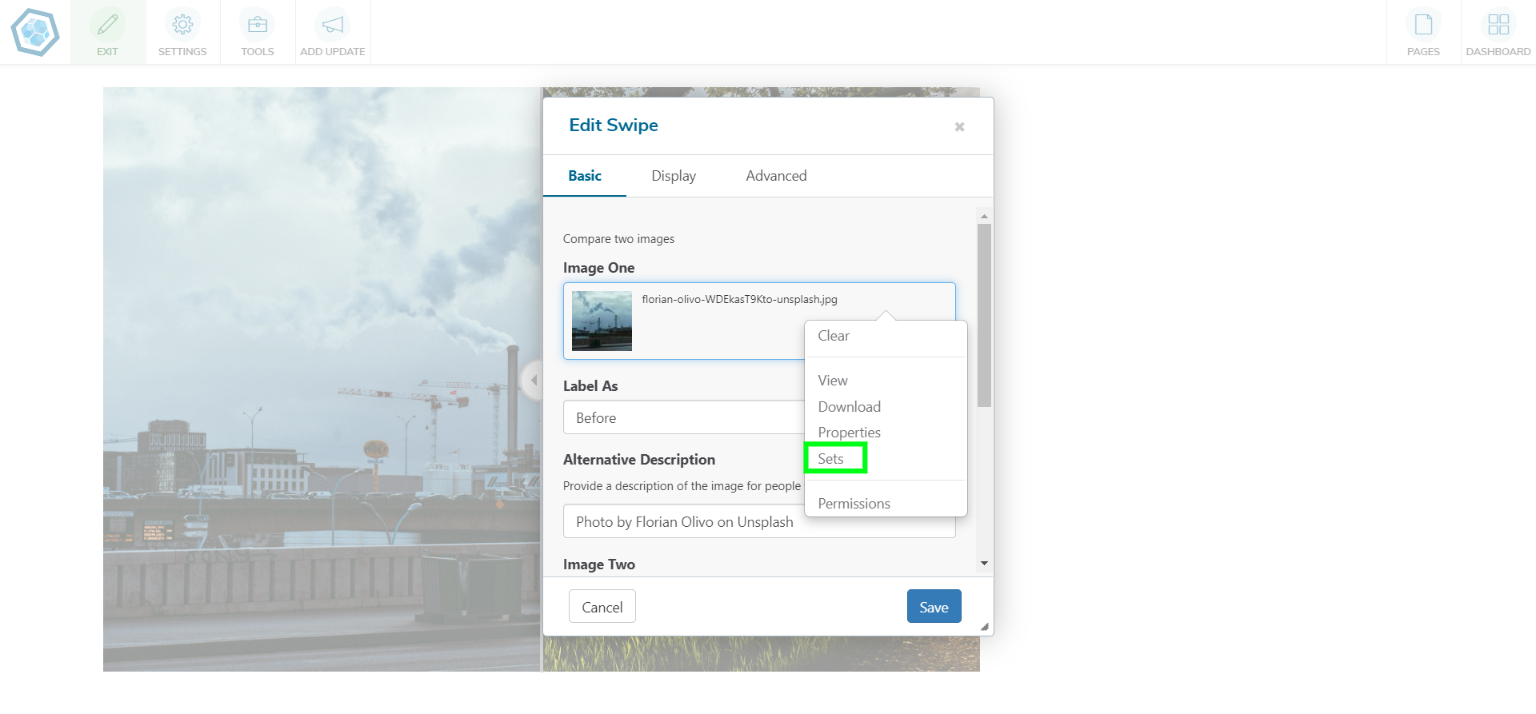
Practice tip: If you add a file that has been added to a Private Project's file set to a different project (including public projects), people will not be able to visualise that file unless they are logged in and have access to the Private Project that the file is associated to, so be sure to add all relevant file sets when adding a file to your projects. To view and add new File Sets to a file, you can:
- Click the "Sets" option in the pop-up menu after clicking an existing file on your Files manager, either in the Dashboard or in a tool's settings
- Click the "Add/Remove Sets" button when adding a new file to the system
Example:
Password-protected projects
Password-protected projects restrict access to anyone that has the generic password for the project. People accessing the project page do not have to be registered members of your site.
Password-protected projects provide a minimal degree of confidentiality and are useful when you invite large groups of users, and it is unfeasible to add them to the site.
You can set any password for a project, through the Settings area of the Dashboard. When users visit the site, they will need to enter that password into the security screen that shows.
Typically, you want to ensure the project status of the project is set to 'Public' when setting up a password-protect project. Otherwise, users will also need to log in if the project's status is 'Private'.
However, you should be aware of several important caveats when applying password-protection to public projects:
- Public projects will appear in your project lists. As public projects appear in your project lists, you must manually exclude them from the project list tool by clicking the hide option in the page settings.
- Password-protected projects will still appear in the search. If a user enters a search term that matches content on your project, it may be partially viewable on the search page (although users cannot access the full site).


