Mapping is a great way to engage, but maps without sufficient information don't always provide enough context to be effective. In this tutorial, we'll learn how to add 'feature' layers to the Web Map and Social Map tools so your participants can leave more informed feedback.
Mapping is one of the best ways to engage on place-based topics. You can use geospatial information to tell a story about a place, a future plan or proposal using the Web Map tool, or collect 'local intelligence' about a place via the Social Map tool.
To be effective, however, maps need to provide an appropriate level of information for participants to orientate themselves and understand the context of the topic. Ensuring your maps give participants enough relevant information will improve the quality of feedback and make your data more reliable and useful.
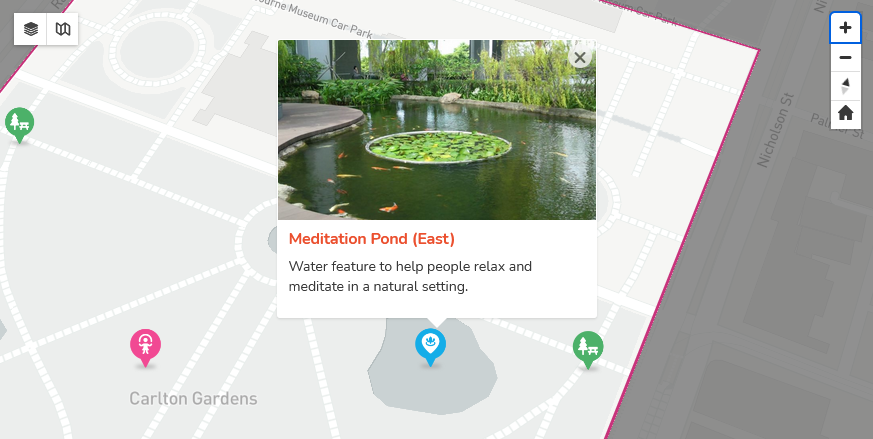
One way of achieving this is to add 'feature' layers, which you can add in both of Social Pinpoint mapping tools. Think of them as clickable 'points of interest' that contain a location, a title, and a description. You can use them to show local facilities likes schools or tram stops, or detail potential design proposals.
Here's an example.
Feature layers are created directly in the mapping tools, but there are a few steps to getting them set up. Let's take a look at how to do it.
First, add (or edit) a Web Map or Social Map tool to any page. Next, click the Layers tab from the left-hand menu. Then click the 'Add Layers' button from the Map layers heading and select 'Custom'.

This will allow you to add new features to the custom map layer you just created. A layer can be either a point, a shape (polygon) or a line. Let's start by giving your new layer a name (in our case Meditation Pond). Then locate the drawing tools at the right of the map (just below the home button).

Choose the corresponding feature type (point, polygon or line), then click the map to draw the feature layer. In our example, we'll add a simple point feature. Click the 'marker icon' in the drawing tools, then click the map on the location where you want to add the feature.
You can add multiple features to a single layer, however, all features must be the same feature type. For example, if we create a layer called 'bus stops', we can add multiple bus stops to that single point layer. Each time we add a bus stop, a new item will be added under the Feature Collection heading.
At this stage, we can also customise the layer style by selecting the marker style, marker colour, icon and icon colour. This style will be the same for all features in the layer.
Once we've set up our layer style, we can customise the details of each feature in our layer. To do this, click the Edit Feature Info link next to the feature name.

This will open a new dialogue where we can provide a title, description and image. Fill out these details and click the 'Save Feature' button to commit the changes. You can repeat this process for all features in the layer.

Once finished, click the 'Save Layer' button at the bottom of the settings panel, and then the blue 'Save' button at the bottom-right of the tool to commit the changes to the map.

You now have clickable features that communicate a greater level of information to your participants!


