News
Take advantage of imagery in your surveys
3 November 2021
Are your surveys sending your
participants to sleep? In this tutorial, we'll look at three ways to
add images to your surveys to make them more engaging.
Let's
face it - most surveys are incredibly boring. They often bombard
participants with repetitive, text-based questions and have a better
chance of sending people to sleep than collecting meaningful feedback.
One
easy way to make your surveys more interesting is to add images. This
simple technique adds visual interest and delivers a more enjoyable user
experience. Even the driest surveys can benefit from a few
well-placed, quality images.
The Form tool provides several
ways to take advantage of imagery including photography, graphics or
even simple icons. You can add images into the Content Screen element,
position them at the top of a survey question or integrate them into
multiple-choice questions.
Let's take a look at an example of a survey that integrates these three methods, then we'll take a look at
how to implement each of them.
Add image to Content Screens
In the first method, we'll add an image to a survey via a Content Screen element. This element can only be used in the Flow mode, which provides a more user-friendly way to present your survey content.
To enable Flow mode on your survey, edit any Form block to access the Editor. Next, click the Display tab from the left-hand menu. Finally, select the Flow option from the Form Type option.
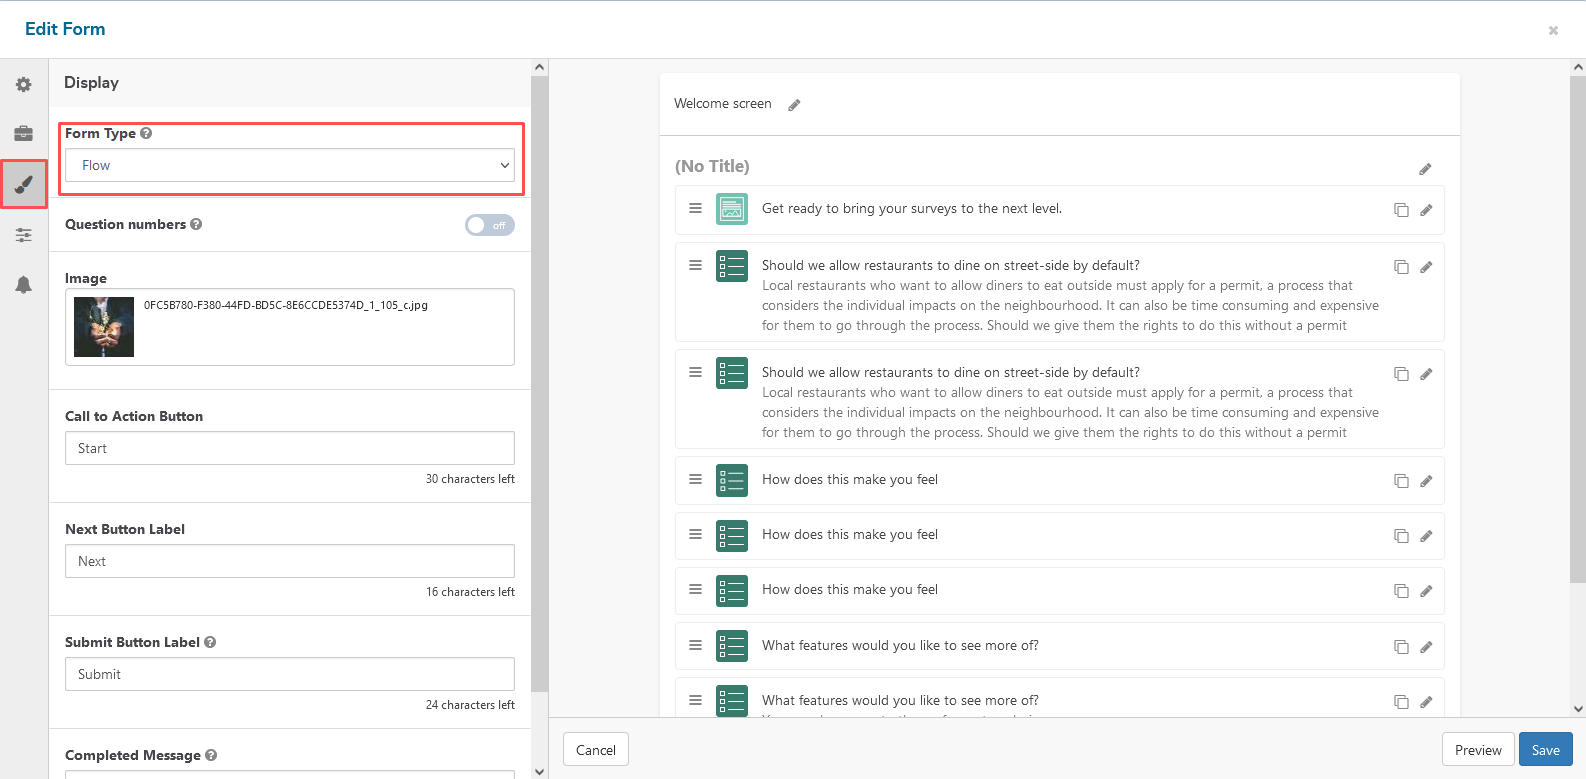
You can also add a cover image to your survey in these settings at this stage. This image appears on the page where your Form block is located, along with a title, description and call to action button which launches the survey.
Now that the survey is in Flow mode, you can add the Content Screen element which lets you provide a title, description and image as a screen in your survey. Content Screens are great for communicating important information or as
section dividers to give your participants a break before answering
the next round of questions.
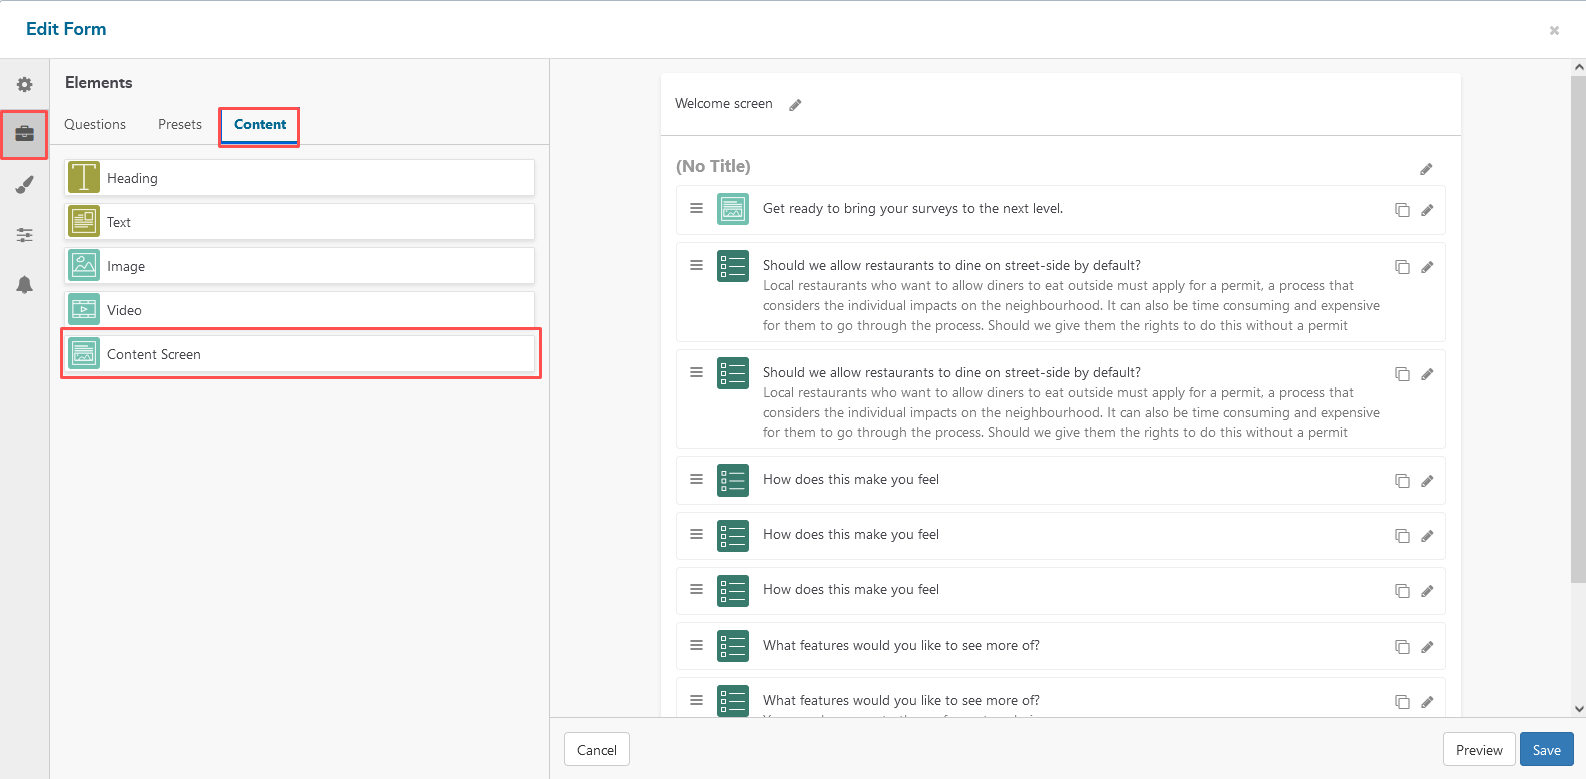
To add it, click the Elements tab from the left-hand menu. Then, select the Content tab (under the Elements heading), find the Content Screen element and drag it into your survey.
Next, select the Image option under the Media heading, then click the 'Choose New File' field and select an image from the File Manager. You can also add a heading and description content to the screen if desired at this stage.
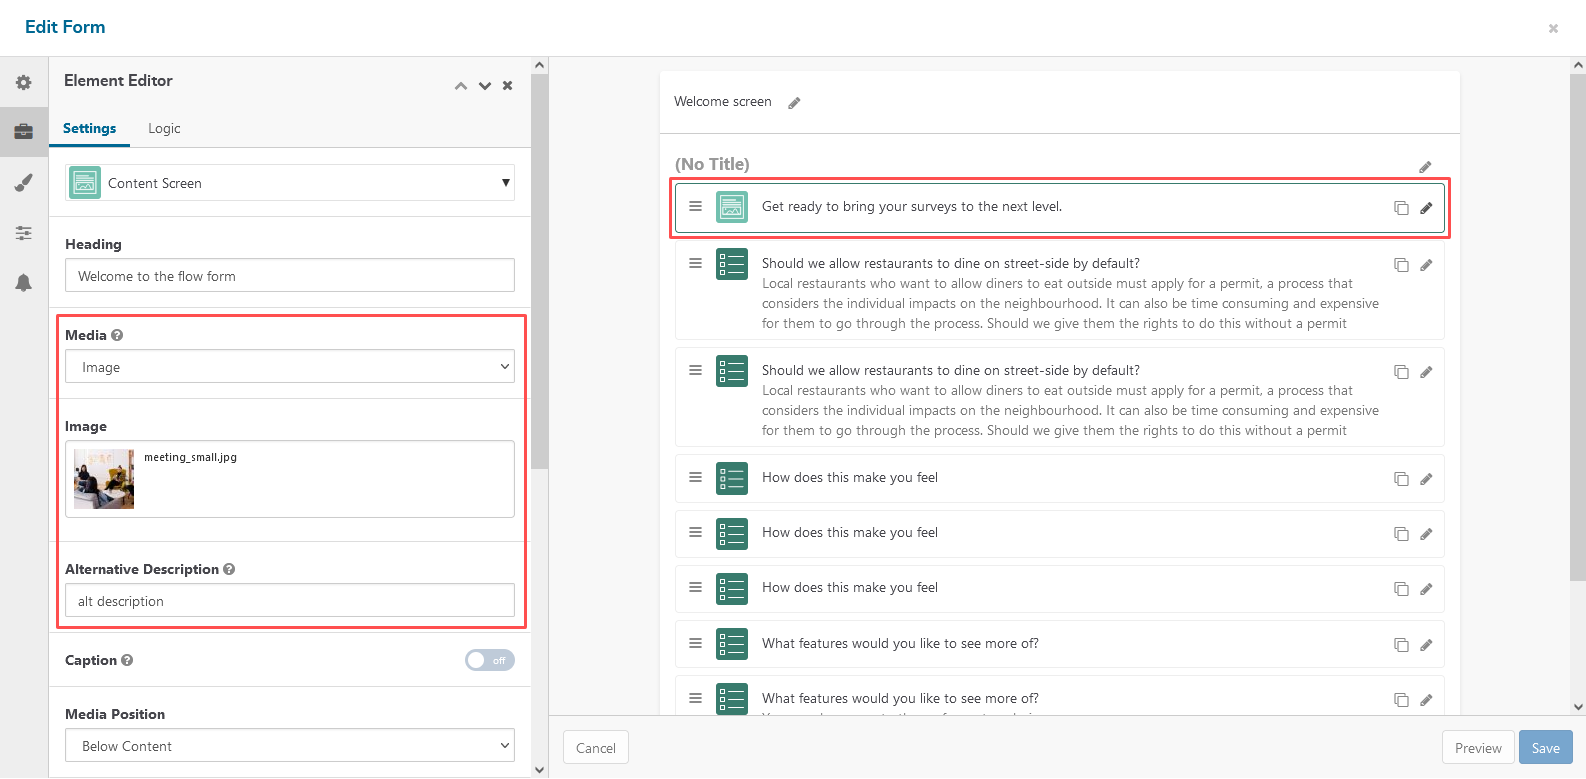
When finished, click the green 'Save' button at the bottom of the settings panel. You can preview the Content Screen you just created by clicking the 'Preview' button at the bottom-right of the Editor.
Add images to questions
In the second method, we'll add an image to the top of a question element. You can use this method to show participants plans, drawings or graphics that relate to the question they're responding to. Here's what it looks like:
To achieve this, first, click the Elements tab from the left-hand menu of the Editor. Then, select the Questions tab (under the Elements heading), and drag any question type to the survey.
Next, turn on the switch next to the Image option within the question settings. Then, click the 'Choose New File' field to open the File Manager and select the desired image. Give your image an appropriate 'alt text' description to improve its accessibility.
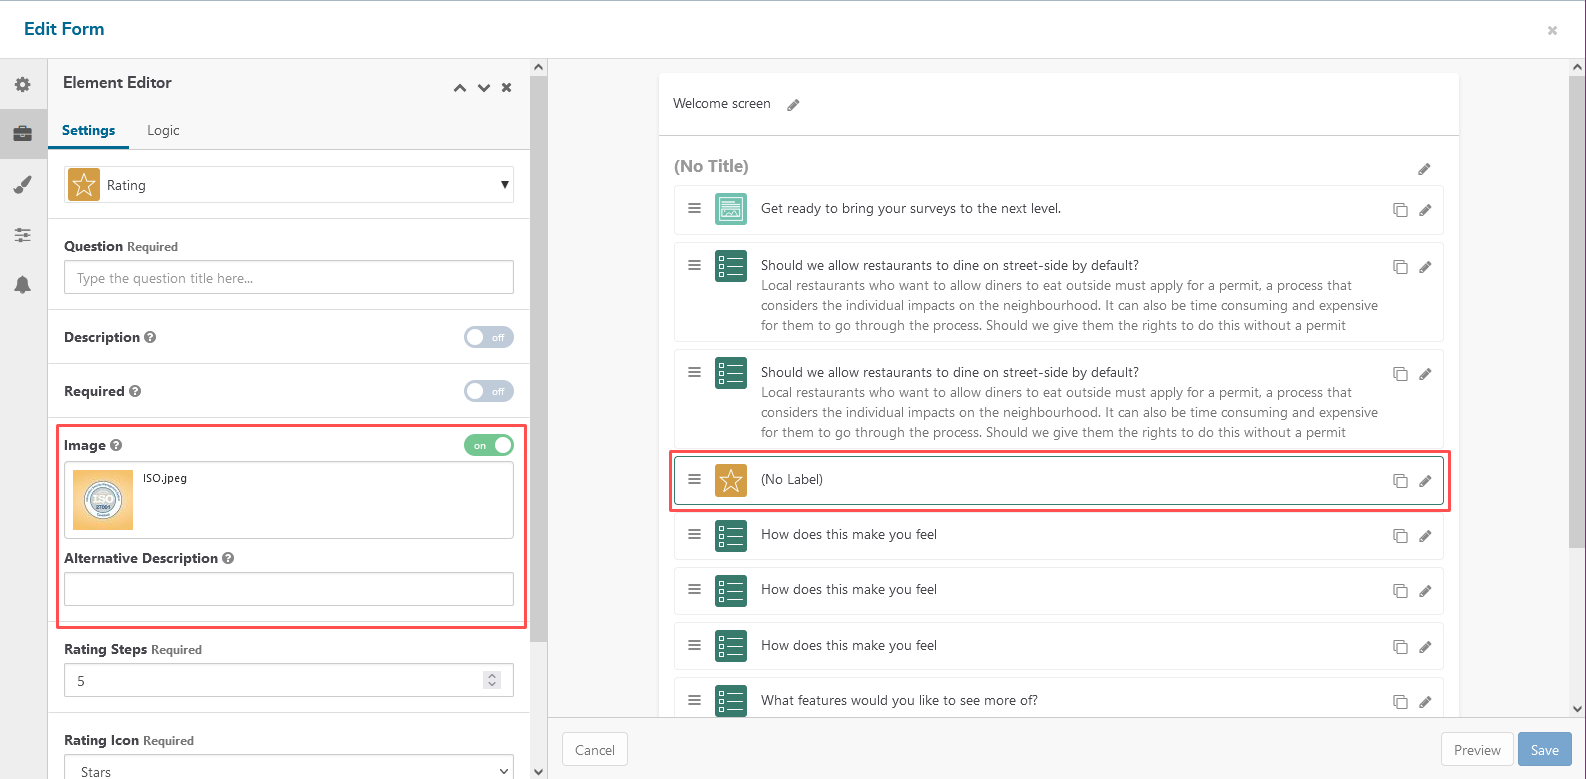
Be careful when using this method with 'long' images (i.e. portrait images), especially if they are only used for decoration. Long images will push the input fields down the page, which might cause your participants to miss them, so ensure your images are appropriately sized.
Add images to multiple-choice options
The final method involves adding images to the response options of the Multi Choice question type. An image will appear next to each option the participant can choose. Here's what it looks like:
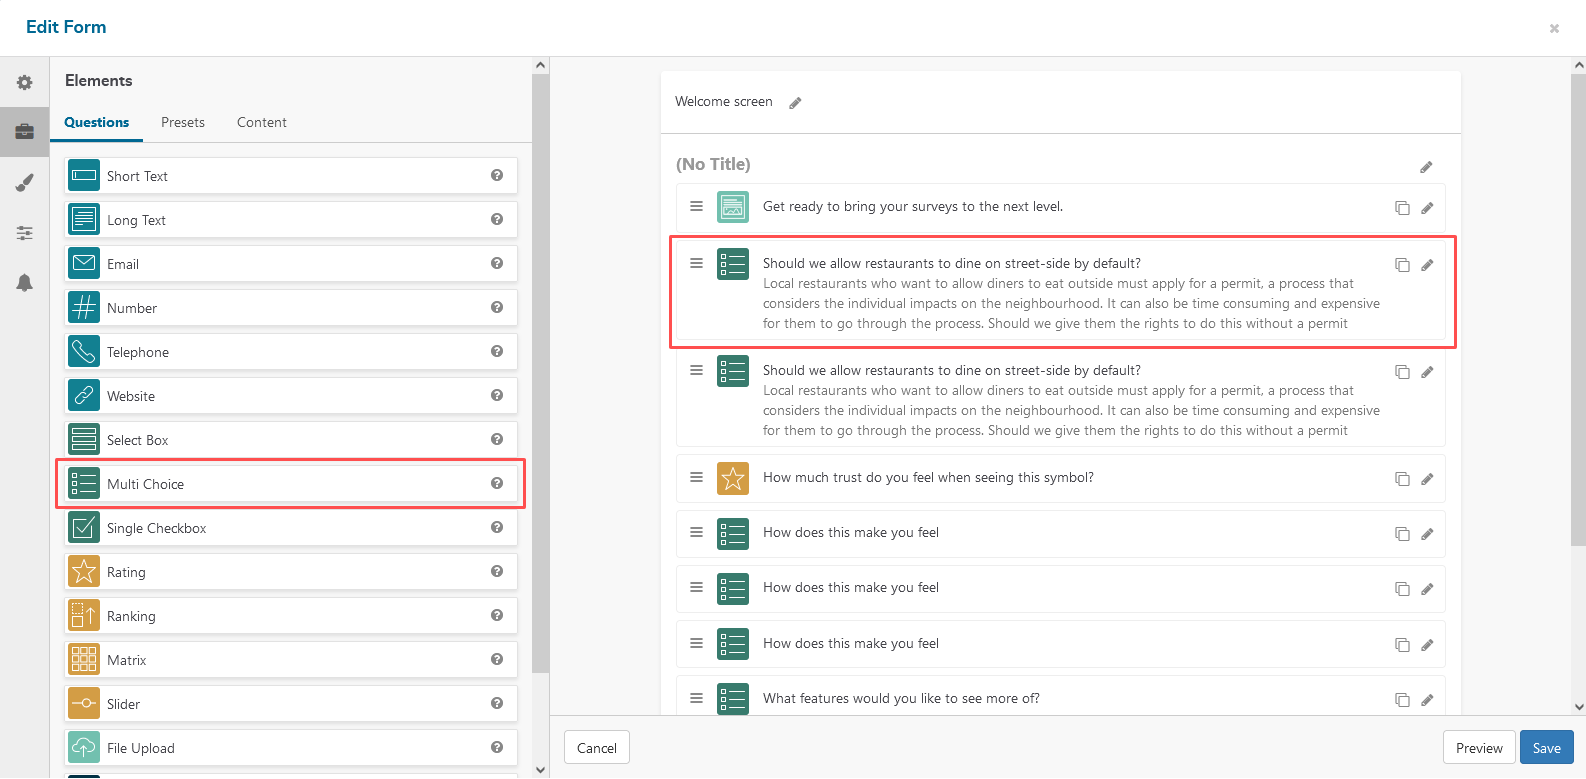
To set this up, click the
Elements tab from the left-hand menu. Then, select the
Questions tab (under the Elements heading), and drag the Multi Choice question to your survey.
Next, turn on the switch next to the Allow image choices option within the settings, and select from one of three size options: small, medium or large. Once you've enabled this setting, you'll notice that the response options under the Choices heading now have a small upload icon next to them.
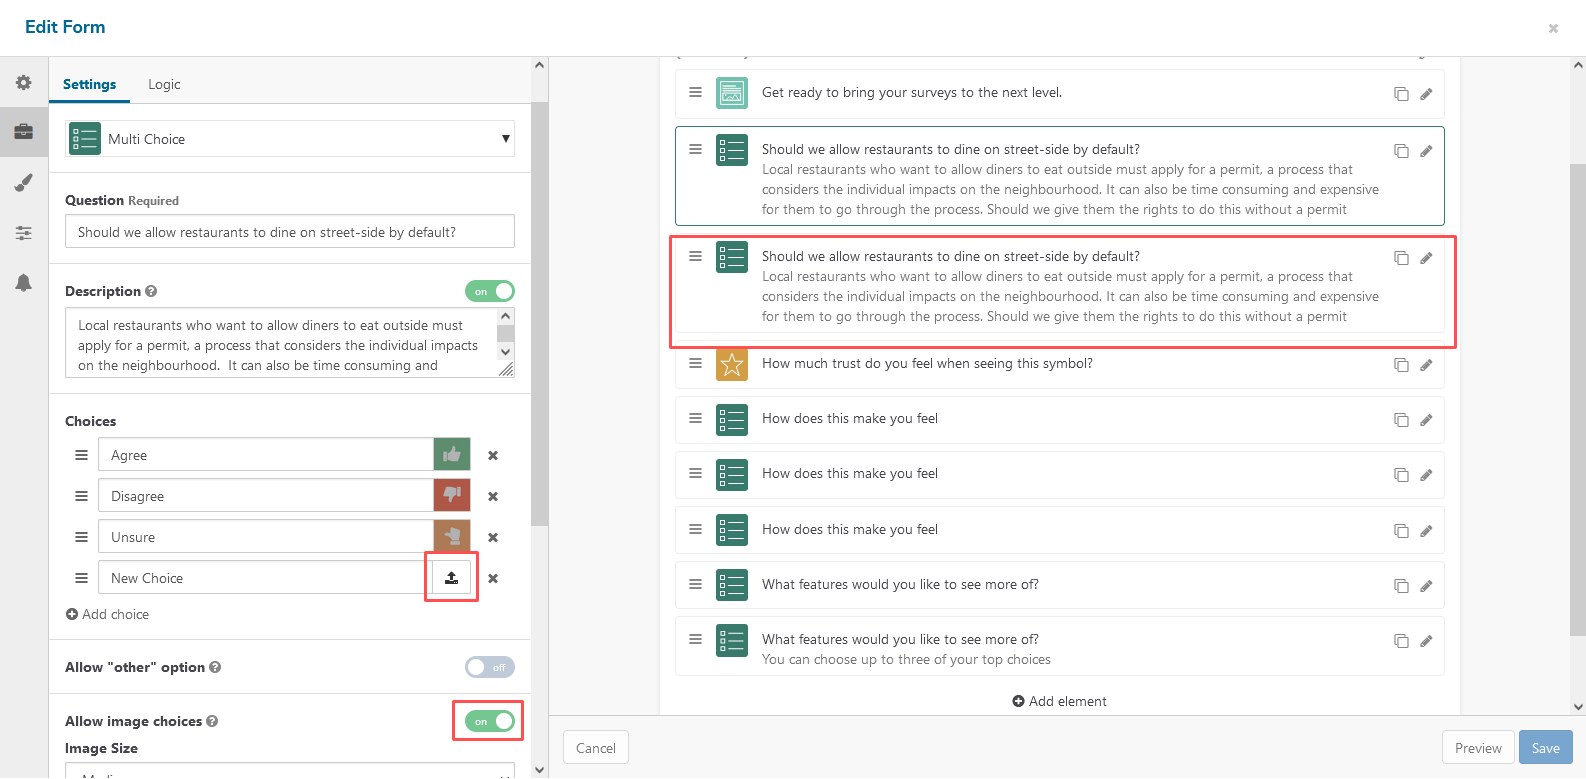
Clicking this icon will open up a further dialogue where you can select an image from the File Manager, add an alternative text description, or even a caption.
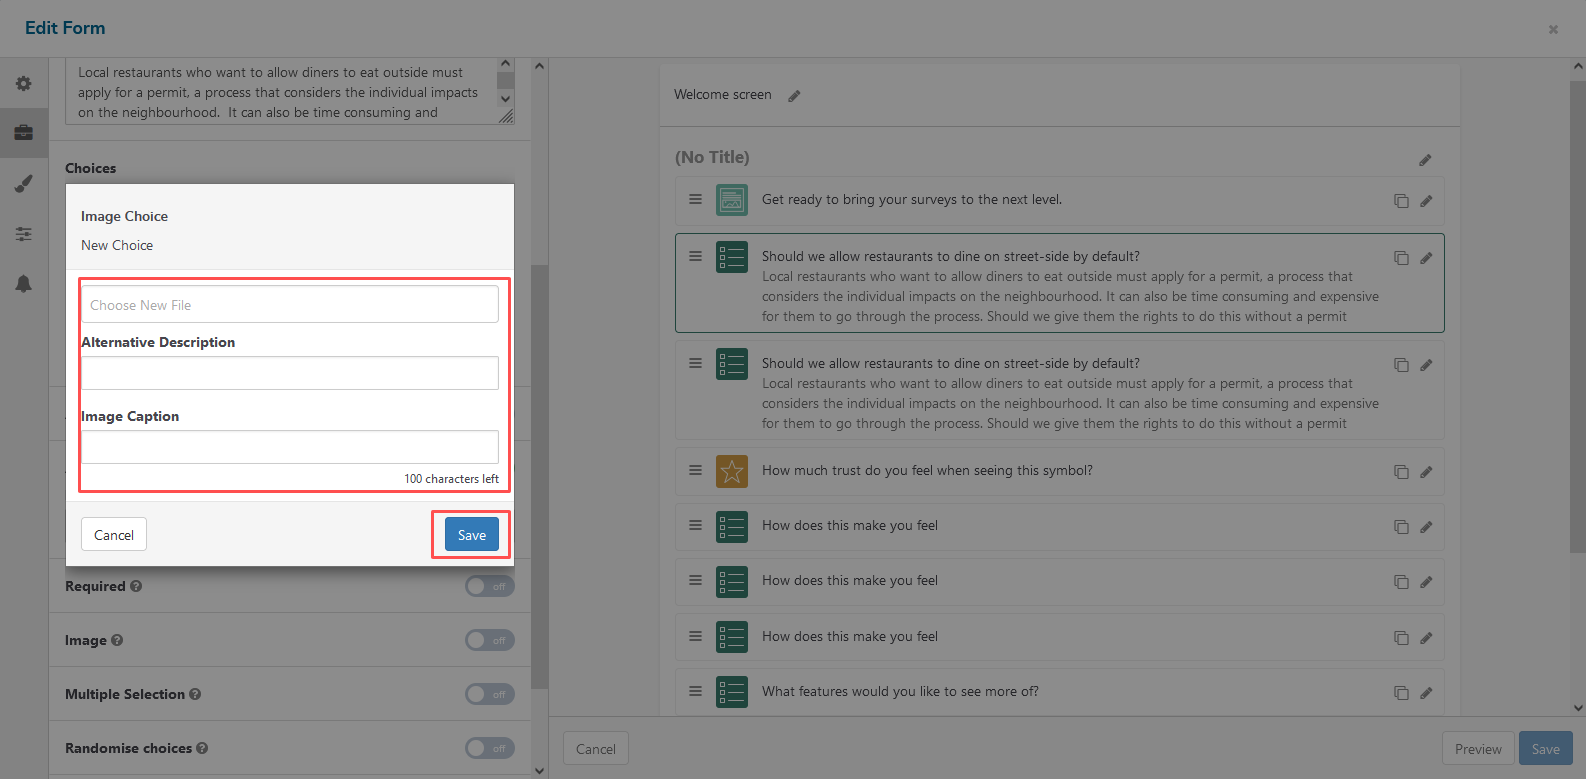
Repeat this process for each response option. You can change or clear these images at any time by clicking the image thumbnail, then clicking the image field and selecting Clear from the sub-menu.
To help you out in your next project, we've provided you with some pre-made icons used in the examples above. Download and incorporate them into your next project.


