This guide applies to multi-project subscriptions for Social Pinpoint and does not cover Single Project or Single Tool plans.
With a multi-project subscription, Social Pinpoint allows you to create 'microsites' semi-distinct websites within your main site—for each project or engagement. These microsites serve as dedicated spaces for communicating and engaging with your audience on specific topics, initiatives, or projects.
Visitors can access these project sites through the homepage or by sharing their unique URLs via newsletters, printed materials, digital ads, or social media.
Each project microsite includes:
- Main Page: Serves as the project’s landing page.
- Sub-Pages (optional): Provide additional information or resources as needed.'
Pages can contain content and tools for collecting participant feedback. The page’s functionality is defined by its Page Type, which is either manually set by site users or automatically assigned when using specific tools (e.g., the Forum tool creates a Forum Page).
Managing Projects
Projects are managed in the Projects section of the Dashboard, where you can:
- Launch new projects using the Project Launch Wizard, a step-by-step setup tool.
- Edit project settings, such as the title, description, image, URL, status, and type.
After setup, a draft Project Page is created as the main landing page. Project sub-pages can be added if needed. Once published, a project card is automatically added to your site’s homepage.
Project Cards

Project cards display the project’s title, description, and image as clickable tiles, helping visitors navigate to project pages. These cards are managed through the Project List Tool, which groups them based on attributes like status (e.g., Open, Active, or Closed).
Projects Interface Overview
The Projects section of the Dashboard lists all current projects, including drafts that haven’t been published yet. Projects are displayed in a table with key details like name, status, categories, and launch date.
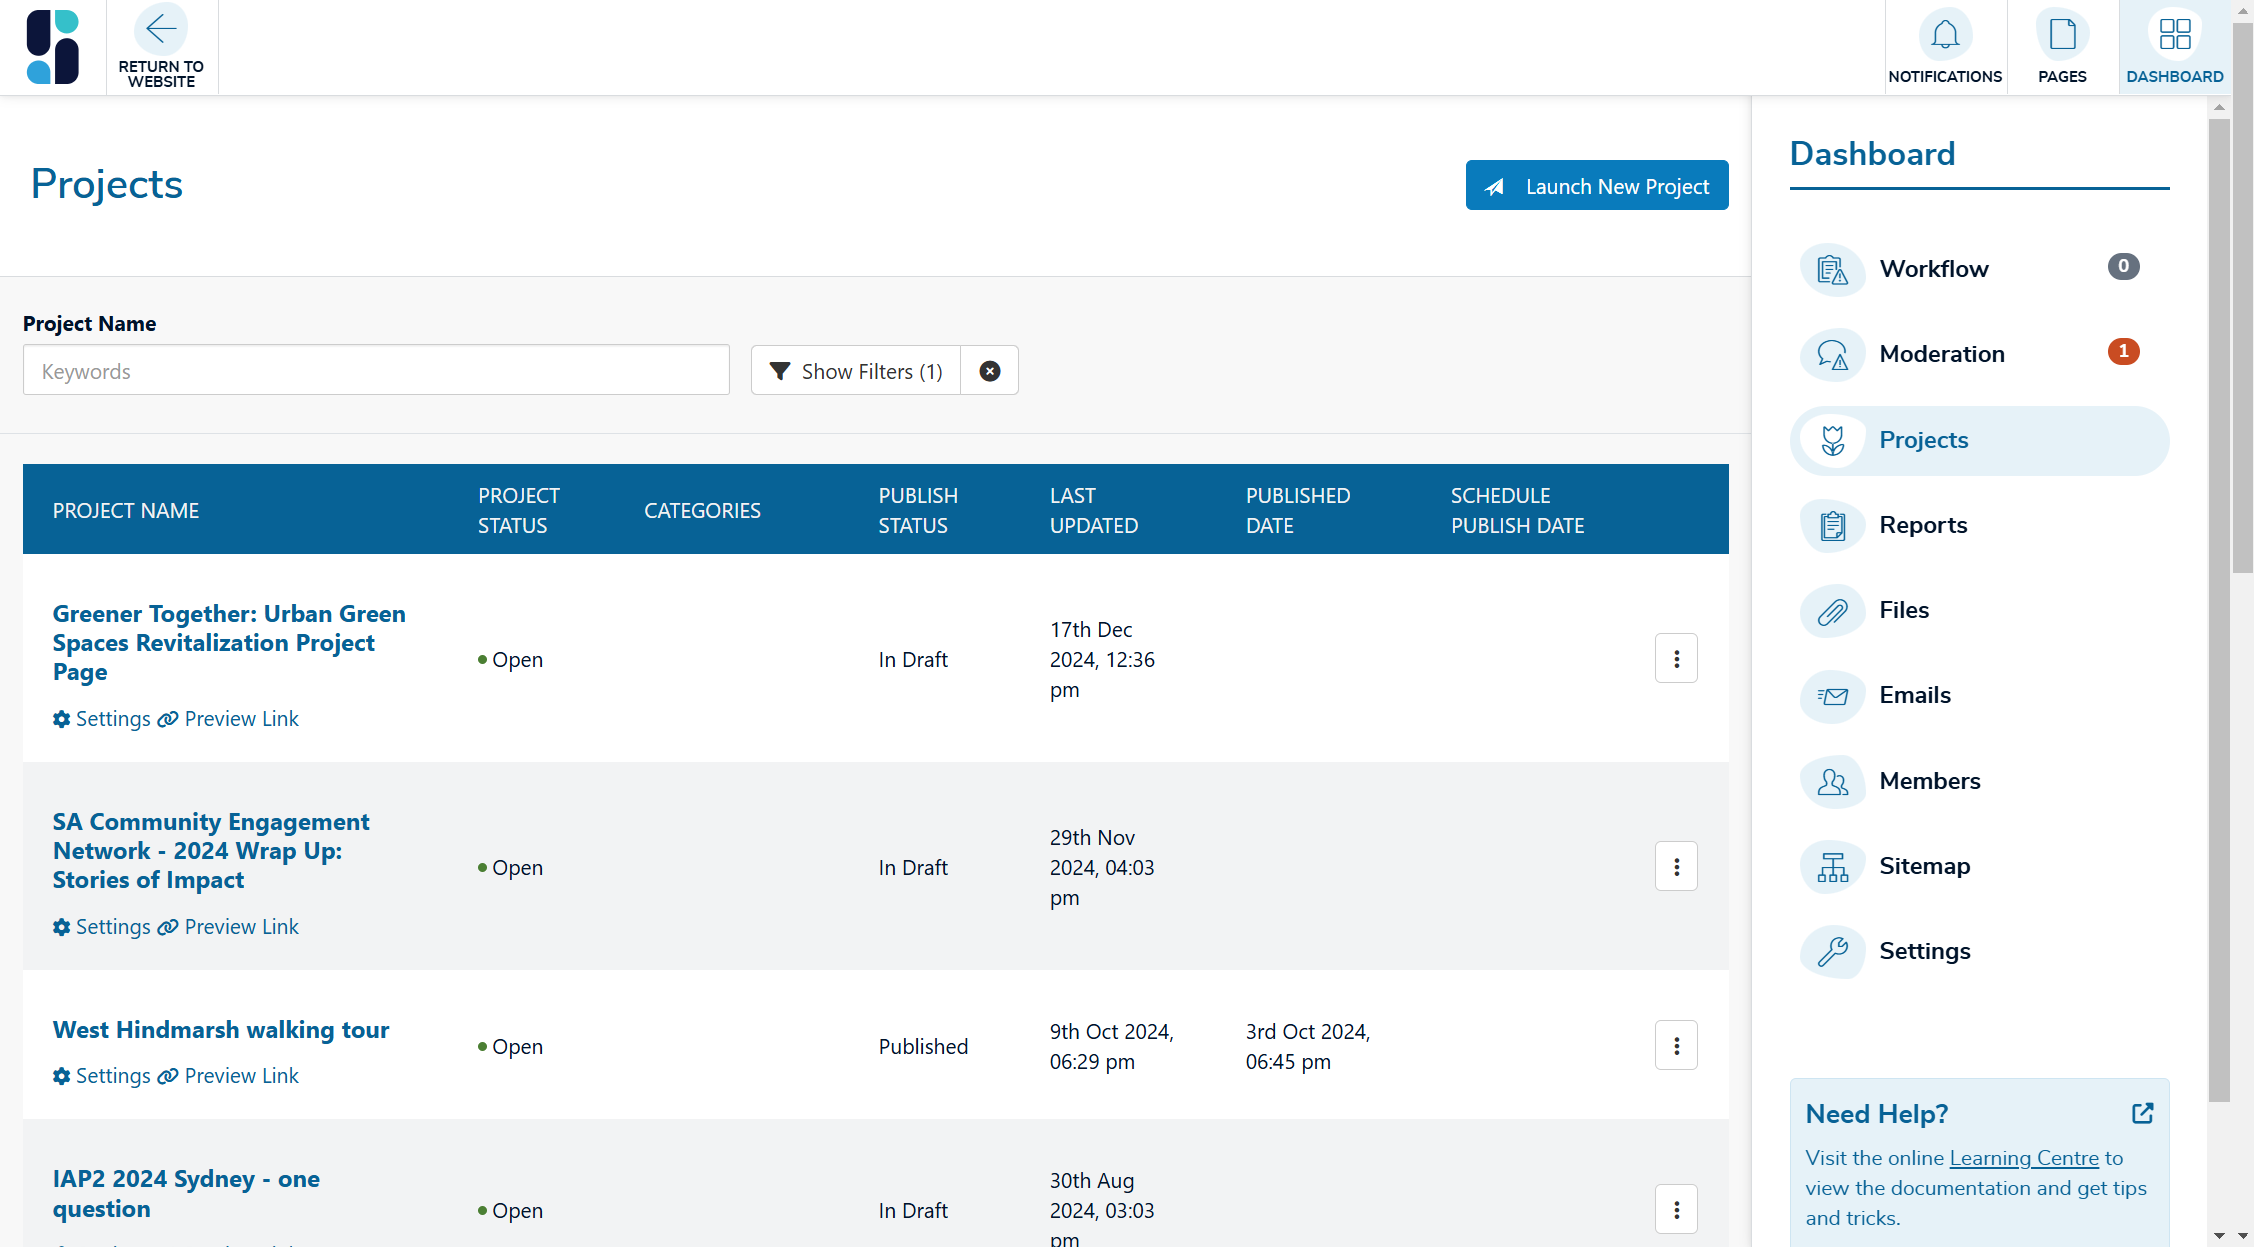
You can use the search, sort, and filter tools at the top of the table to quickly locate specific projects.
Access Control
- General Users: Can view only the projects they are assigned to.
- Team Leads: Can see all projects associated with their team.
- Site Administrators: Have access to all projects.
In most cases, only Site Administrators and Team Leads can create new projects.
💡 NOTE: You can click on a project name in the table to navigate directly to its project page.
Project Settings
The settings you set for each project are used to perform a variety of functions and tasks. Project settings are configured when the project is first created, and can be edited any time after launch.
For example, the Status setting is used to determine where the project card appears on the home page to communicate wehther it is open for consultation or not. The Type setting can be set to 'Private' to make the project only visible to invited guests rather than any member of the public.
The project settings available in Social Pinpoint are:
- Project name - Identifies the name for the project used in the System. The project name is also displayed in the project card and the project banner of the project page. The project name must be 70 characters or less.
- URL - Determines the web address for the project (e.g. yoursite.com/project-name) that helps visitors navigate to the page. The URL cannot contain any spaces or special characters.
- Description - Provides a description of the project which is displayed on the project card and in the project banner of the project page. The description must be 170 characters or less.
- Status - Sets what 'stage' a project is at and determines the position of its project card on the homepage or any other project list. The three statuses available are 'Open', 'Active' and 'Closed'
- Type - Determines whether a project is 'Public' and visible to any visitor, or 'Private' and can only be viewed by invited guests (Members).
- Locations - Tags the
project with the geographical location it relates to. It is used to
help visitors find projects they are interested in and determine which
Members will receive auto-notifications when the project is first
published. An 'all' option will automatically select all locations for
the project.
- Category - Tags the project with the topics it relates to. It is used to help visitors find projects they are interested in and determine which Members will receive auto-notifications when the project is first published. An 'all' option will automatically selects all categories for the project.
- Group - Associates a project with other related projects for reporting purposes.
- Follow - If enabled, allows users to subscribe to the project's mailing list for campaigns.
- Teams - If enabled for your site, associates a project with a 'Team' value that corresponds to an internal business unit such as a department, agency, working group, etc.
- Permitted Users - Defines site users' roles for working on the project.
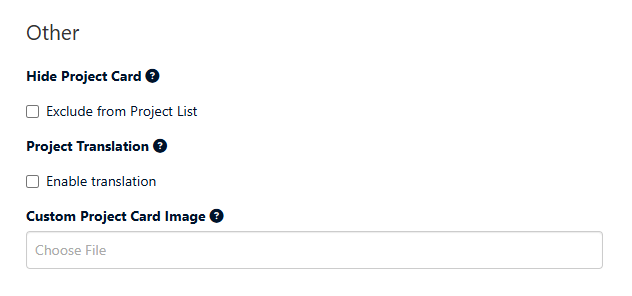
- Hide Project Card - Removes the project from appearing in project lists.
- Custom Project Card Image - Set a custom project thumbnail.
- Translation - Enables project translation if this feature is available for your site.


 ) next to the project