News

Enchance language accesibility with translation boxes!

21 August 2025

⚠️ Please note that we recommend this task be handled by someone with basic HTML knowledge, as setup and some customisation will be required.

Expand your translation capabilities by adding translation buttons! While the platform does support translation project pages via the Translation button in the navigation bar, adding custom language boxes would further enhance your use experience.


Using translation buttons your users can easily switch over the language without the need to open the language menu - which is an advantage for non-Romanized texts since you can make your buttons images to be written in their native language!


A huge shout out to Innerwest who pioneered this experimentation with their HTML code skills!


Examples

Here are a couple of site that uses these in their projects


Inner West - Traffic Project


Yarra City's - Local Review 2025


Translation buttons

Arabic

Arabic

Chinese Simplified

Chinese Simplified

This page is currently written in English, please click one of the buttons on the main area to translate it to Chinese or Arabic.

Setting up


1. Copy the base code below (There is a copy code button)

2. Add an HTML block to your desired page.

3. Customise the languages, icons, and text to match your site's.

  • More instructions below for adding more languages to the code.


    <style>
         .languageGrid {
            display: grid;
            grid-template-columns: auto auto;
            gap: 10px;
            overflow-x: auto;
            justify-items: center;
        }
        .languageBox {
            cursor: pointer;
            width: 100px;
            text-align: center;
        }
        .languageImage {
            width: 100px;
            height: 100px;
            display: block;         /* ensures image behaves as a block */
            margin: 0 auto;         /* centres horizontally */
            transition: filter 0.3s;
        }
        .languageImage:hover {
            filter: brightness(70%);
        }
        .languageText {
            margin-top: 5px;
            font-size: 14px;
            font-weight: bold;
        }
        
        @media screen and (max-width: 480px) {
            .languageGrid {
                grid-template-columns: auto auto auto auto;
                gap: 5px;
            }
        }
    </style>

<div class="languageGrid">
    <div class="languageBox" onclick="translatePage('?ljs=ar')">
        <img src="https://learn.socialpinpoint.com/download_file/1195" alt="Arabic" class="languageImage">
        <p class="languageText">Arabic</p>
    </div>
    <div class="languageBox" onclick="translatePage('?ljs=zh-Hans')">
        <img src="https://learn.socialpinpoint.com/download_file/1196" alt="Chinese Simplified" class="languageImage">
        <p class="languageText">Chinese Simplified</p>
    </div>
</div>

<script>
function translatePage(languageParameter) {
    // Get the URL of the current page
    var currentPageURL = window.location.href;
    // Navigate to the translated page with the selected language parameter
    window.location.href = currentPageURL + languageParameter;
}
</script>


Adding languages

In order to add more language you just need to add this code below the previous </div> code within the <body> </body> section of the code base:


<div class="languageGrid">
    <div class="languageBox" onclick="translatePage('?ljs=<strong>LANGUAGE-CODE-HERE</strong>')">
        <img src="<strong>LINK-TO-YOUR-ICON</strong>" alt="Chinese Simplified" class="languageImage">
</div>
</p>


What you need to complete the setup:

  1. Language Code - find your codes from the full language list here.
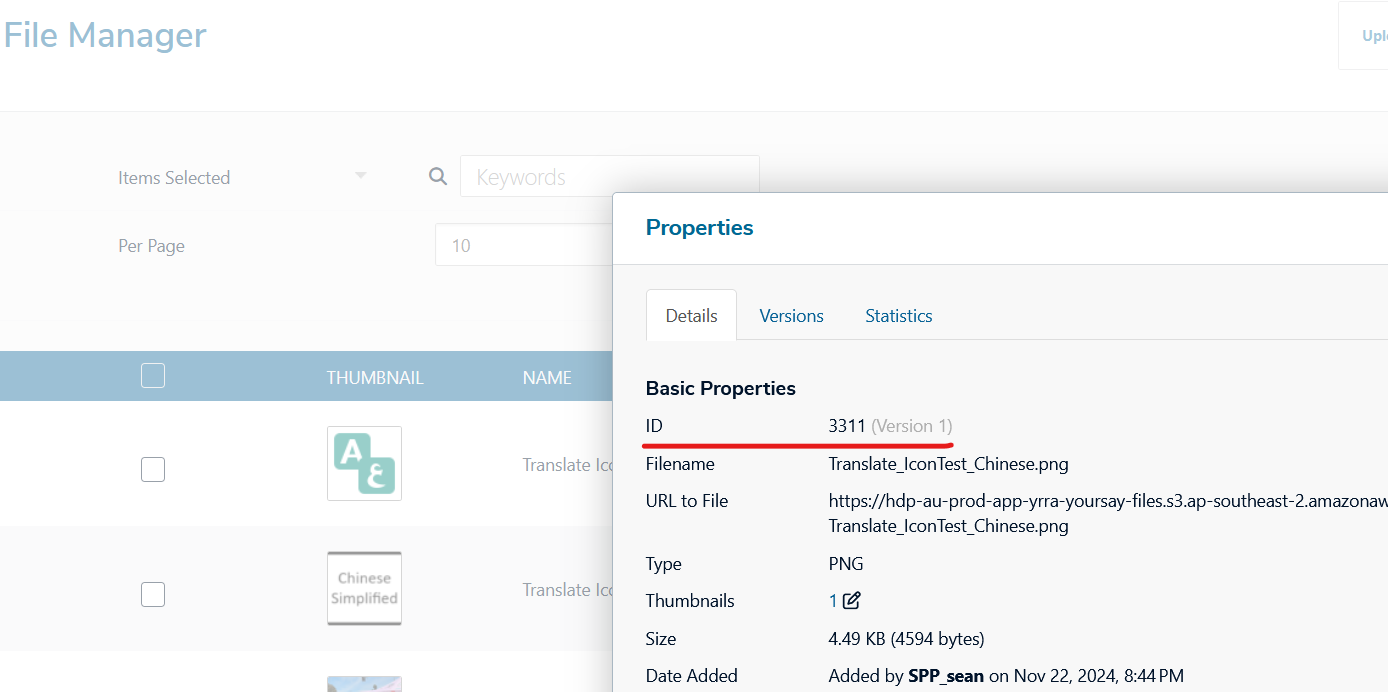
  2. PNG icon - upload images to be used as your icons to your site's File Manager, grab their respective "File IDs" to add to the javascript code.
  3. File ID URL - obtained by clicking the file in File Manager, selecting Properties and copying the file ID, assign the file ID to our default download link i.e. https://yourwebsite.com.au/download_file/3311.


You can find the File ID by selecting the image and then 'Properties'


Once you have the File ID you just need to replace the 'LINK-TO-YOUR-ICON' to the actual link for the file which would be for example 'https://yoursayyarra.com.au/download_file/3311' and the LANGUAGE-CODE-HERE to the respective Code.


Notes

  • These language boxes simply act as quick links to the translated page versions.
  • Ensure your project is already configured for multiple languages before adding buttons.
  • This approach is not fully accessible and may not meet accessibility compliance standards.
  • The HTML code provided is a custom enhancement. Social Pinpoint does not provide support for modifications to this code, and we cannot guarantee compatibility with all content tools.


🎯Key Actions

Need further customisation? This section controls how the language boxes are styled how they look and how they are positioned.

The purpose of this container arranges your language boxes.


<code>.languageGrid { display: grid; grid-template-columns: auto auto; gap: 10px; overflow-x: auto; justify-items: center; } </code>


Settings

  • grid-template-columns: auto auto; - controls how many columns of boxes you see in a row.
    • auto auto; - 2 boxes side by side.
    • auto auto auto; - 3 boxes side by side.
    • Add or remove “auto” to change the number of columns.
  • gap: 10px; - space between the boxes. Increase for more space, decrease for less.

The purpose of this container is the size and alignment of each box.


<code> .languageBox { cursor: pointer; width: 100px; text-align: center; } </code>


Settings

  • width: 100px; → changes how wide each box is.
    • If your text is long (i.e. “Chinese Simplified”), you can make this wider, like 120px.

The purpose of this container is to control the size and behaviour of the flag or image in each box.


<code> .languageImage { width: 100px; height: 100px; display: block; margin: 0 auto; transition: filter 0.3s; } </code>


Settings

  • width & height - control the image size. Both are in pixels (px).
    • 80px makes the images smaller.

This container changes how the grid looks on small screens (like phones).


<code> @media screen and (max-width: 480px) { .languageGrid { grid-template-columns: auto auto auto auto; gap: 5px; } } </code>


Settings

  • grid-template-columns: auto auto auto auto; → number of boxes per row on mobile.
    • auto auto; will show 2 per row instead of 4.
  • gap: 5px; → space between boxes on mobile.
  1. Facts tool - You won't be able to add an item or edit the Facts block with the HTML script running.
    • A solution would be to remove the HTML block temporarily and work on the Facts tool then re-add the HTML block for the translation block.